Getting Started
How to run the project locally
1. Clone the project
git clone <PROJECT URL>
2. Set up nextjs app
2.1 Make sure that nodejs is installed. Install project dependencies:
npm install
2.2 Rename '.env.example' to '.env.local' and fill in the environment variables.
mv .env.example .env.local
3. Set up Supabase
3.1 Install Docker
3.2 Install Supabase CLI
3.2 Run Supabase. You need to run this command in the project folder. It will take info from the supabase folder and run Supabase in Docker.
supabase start
This command will run Supabase in Docker and will create a new database for you. You will see the following output:

Copy the following values from the output and paste them into the '.env.local' file:
API URL -> NEXT_PUBLIC_SUPABASE_URL
anon key -> NEXT_PUBLIC_SUPABASE_ANON_KEY
service_role key -> SUPABASE_SERVICE_ROLE_KEY
These are your Supabase dev environment variables. In production, you will need to create a new Supabase project and use its environment variables. You can find them in the project settings.
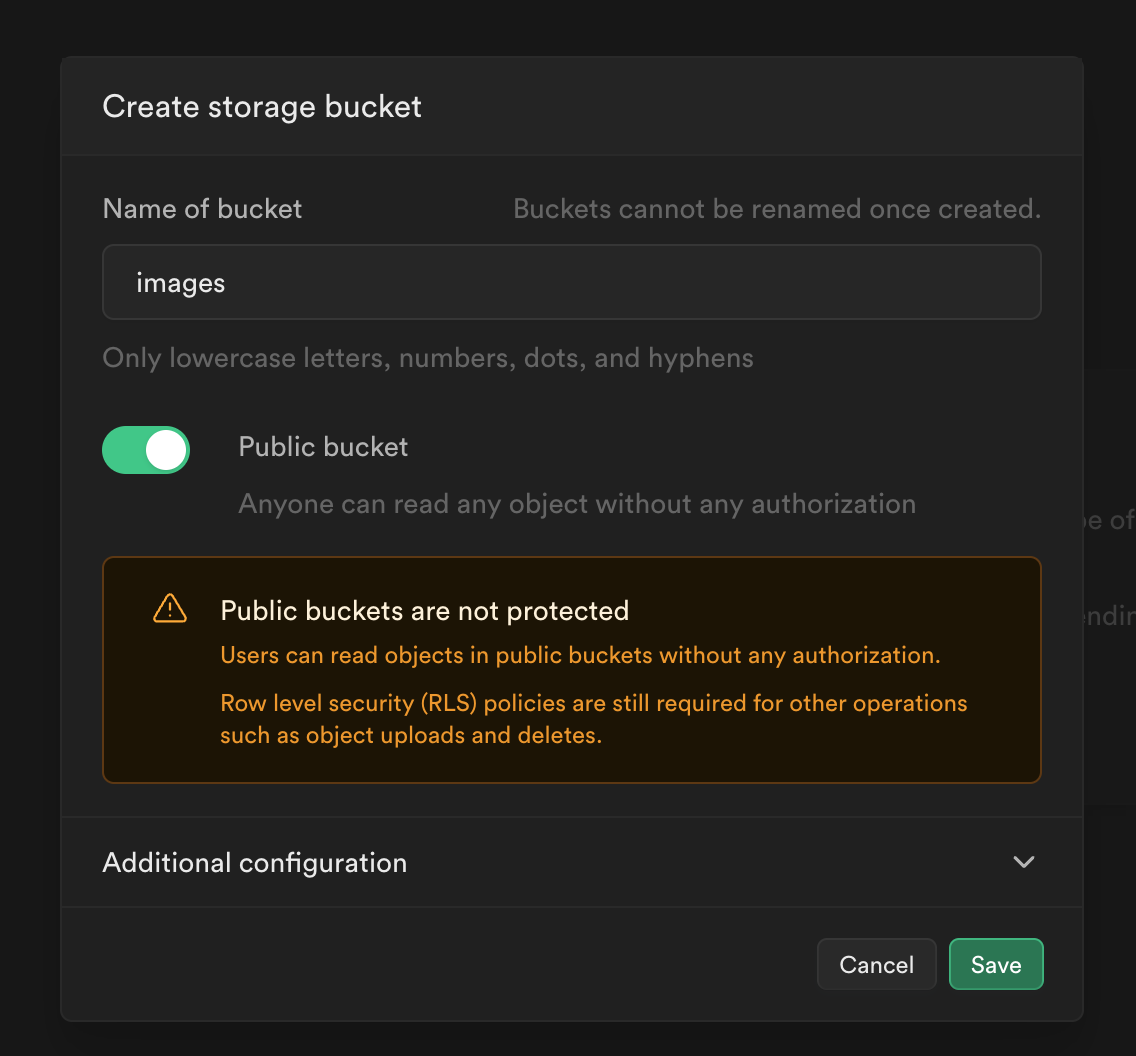
3.3 Create Supabase Storage bucket called 'images':
- Go to the Supabase Local Studio dashboard and click on the 'Storage' tab: http://localhost:54323
- Click on the 'Create bucket' button
- Enter 'images' as the bucket name. Make the bucket public by checking the 'Public' checkbox (this is for reading images only). Click on the 'Create bucket' button

3.4 Apply existing Supabase migrations. This includes Row-Level Security (RLS) policies for both DB and Storage.
supabase db reset
4. Run the project for development
npm run dev
- Open http://localhost:3000 with your browser to see the result.
Conclusion
That's it! Now you have a local Supabase project and a local NextJS app. Now it's time to go live.